Update - No.1 - 09.02.11
Originally posted to friends and family only in Feb 2011
Hello and welcome!
 |
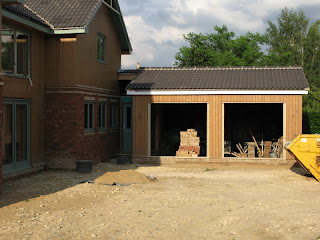
| Basic shell of the garage is erected |
I have been talking about building a model railway for probably the last 10 years or so but always putting it off using various excuses - the usual one being I have to finish building my house. Well, the excuses have to end and it's time to put up or shut up! The house is now finished and I have spent the last few weeks clearing the garage (where the layout will be built) ready for work to begin......no more excuses - it's time to get to work!
I hope you'll enjoy this blog because you are either a perfectly normal person who is foolish enough to show some interest in what I want to do or because you are one of the complete "Cranks" or "Neds" known to me and you intend to turn up here and play trains once I've done all the hard work! You could also of course be one of our family friends with absolutely no interest in trains and this will explain to you why Mrs Corky is constantly rolling her eyes and sighing when model railways are constantly being mentioned! If you don't think you fit into any of these categories then please accept my apologies and I'll understand if your finger is now heading for the delete button!
 |
| Garage is clad and awaiting wooden doors |
The one thing that has never wavered through all the years of planning despite numerous changes to design and concept, is a determination that nothing will be destroyed or broken up if we have to move house in the future. Whilst we have no intention of moving right now, circumstances change and we may need to relocate. If that happens the layout needs to be modular so it can be unbolted and taken to it's new home and simply reassembled. This means nothing is attached to the walls and new lightweight techniques for baseboard construction need to be used. Remember, the layout will be on 4 levels so this is a major challenge. I will probably describe how I intend to build the baseboards in the next thrilling instalment....don't say you haven't been warned!
 |
| Finished garage with wooden cladding and painted doors |
 |
| Interior of the garage during the house build |
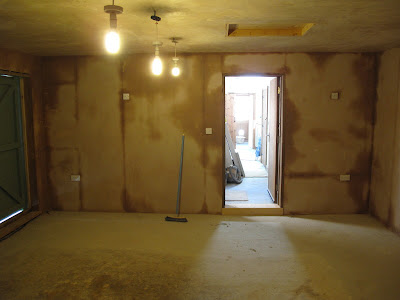
Anyway that's enough for the first posting. I've attached some photos of the garage, which was designed from the outset to house the layout. They show how it looked when being built, when it was being used as a workshop for the house build and then the more recent shots show the room being plastered, painted and finally the doors being plugged with insulation board ready for habitation.
 |
| Garage doors newly painted seen from inside the garage |
 |
| An emptied garage with newly plastered walls |
 |
| Entrance from side hallway into the garage |
 |
| The plastering dries |
That's quite enough for now. Until next time, all the best, Corky!
No comments:
Post a Comment